Artwork Guidelines

Learn more about our artwork requirements for custom printing. We prefer that print ready files be used when uploading graphics, photos and other images into our Design Tools. The tips and guidelines below will help ensure that your order continues through our production process without delay.
If your artwork does not fit these guidelines your order will likely be placed on hold while we contact you for better images. When orders are placed on hold the quoted turnaround times are also placed on hold until a solution to the image issues are resolved.
Quality is very important to us and something we take very seriously. All orders go through a pre-production process where we will review your design and image settings to ensure optimal results. Reading through these Artwork Guidelines before placing your order will help ensure best results.

See our other design Tips.
Acceptable Upload File FormatsWe can accommodate a variety of file formats for uploaded artwork.
- Adobe Acrobat Document (*.pdf) (recommended)
- PNG Image (*.png)
- JPEG Image (*.jpg,*.jpeg)
- TIFF Image (*.tif)
- Bitmap Image (*.bmp)
- GIF Image (*.gif)
Though you cannot upload some vector file formats we do prefer them when possible. Please feel free to email us any of the following file formats after you place your order. If you have access to the vector file please email your vector files to info@stickylife.com. Be sure to include your order confirmation number in the subject line or email so that we know what order to attach the artwork to.
We accept any of the additional file types for production via email:
- Adobe Illustrator Artwork (*.ai) recommended
- Encapsulated PostScript (*.eps) recommended
- Adobe Photoshop Image (*.psd)
- CorelDRAW Image (*.cdr,*.clk)
Please use vector artwork when possible. Convert all text (fonts) to outlines (paths). Raster and bit-mapped images should be no less than 300 dpi at print size. If you do not have access to a vector file you may want to consider having your image vectorized. There are businesses out there that can convert your raster file into a vector file at reasonable prices. When ordering large quantities we suggest first ordering one or two as a sample.
Vector v.s. Raster What is the difference in vector & raster artwork?
- Raster Files:
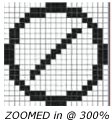
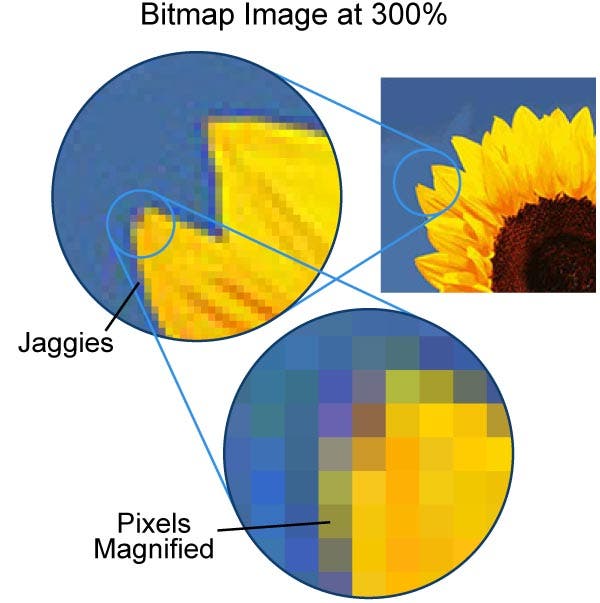
- Raster files are made up of tiny squares, known as pixels, as illustrated in the diagram to the left (zoomed at 300%). The appropriate: pixels are filled in to represent a design's lines and arcs. When rastered images are enlarged too much jaggies become visible.
- The quality of a raster file is measured in DPI (dots per inch). In order for us to use a raster file, the resolution of the file must be at least 300dpi at full scale. We cannot enlarge an existing raster file without losing some of its graphical quality.
- The majority of images are raster files. Photos are always raster images. If your image file ends with any of the following extensions then your image is a rastered or bitmaped image and you will need to verify the resolution. .jpg, .jpeg, .bmp, .gif, .png, or .tiff.

- Vector Files:
- A vector file, on the other hand, is a file whereby lines and arcs are stored as vector coordinates. This means that vector files are made up of precisely defined entities, each with its own beginning and end, rather than lumpy groups of pixels as found in raster files.
- Vector files can be enlarged and manipulated without loosing visual quality.
- Raster files can be converted into vector files but we do not provide this service. There are many online companies that will c
What is resolution?
Resolution is only an issue with bit map images (aka raster images) and refers to the number of dots per inch (dpi), or the amount of detail the image has. Because resolution is something that only affects rastered images we prefer to receive vector files when possible.
Digital images can be used to create custom designed products. Any raster or bit map image you plan to use must have 300 dpi at 100% output size for best results.
You may be able to increase the resolution of an image by shrinking the print size. For example, an image captured at 600 x 900 pixels has 150-dpi at 4” x 6”. However, it can be printed at 300-dpi by reducing its dimensions on the product to 2” x 3”. It is impossible to enlarge a raster graphic without loosing resolution. Enlarging a bitmaped image too large will produce jaggies. For instance if you have an image that has 300-dpi but is only 1”x1” in physical size - you could enlarge the image to 2”x2” but the resolution will reduce to 150 dpi. That would still be acceptable for production purposes but not ideal. The image would not be acceptable as a 3”x3” (75-dpi) and the results would be undesirable by anyone's standards.

Images saved from the web are typically at a resolution of 72 dpi. This resolution is far below acceptable quality standards for print. In addition, images found on the web are usually protected by copyright laws. For these reasons, we do not recommend using images from the web unless purchased from a professional image supplier.
It is however possible to find royalty free images on the internet with very little legal limitations. If you happen to find a royalty free image that you would like to use double check the dpi (dots per inch) and overall width and height.
Calculate Image ResolutionTo figure out the resolution of an image you can look at the pixel details for the image. This can be done by right clicking (Ctrl click on Mac) on the image file and selecting properties and then select the Details tab. This will provide you details about your image. When you do a Google search for an image Google also provides you with dimension details. Use these pixel dimension details for width and height to calculate the actual physical size of your image for printing.
Use the following mathematical equation to calculate the ideal printable size.
Pixel height divided by 72. Results divided by 4.16 The answer will provide you with a the ideal size your image can be printed. You can then do the same calculation for your width.
Example: If I have an image that has a pixel height of 2500 pixels.
2500 / 72 = 34.72"
34.72" / 4.16 = 8.35" height
This image can be printed with an ideal resolution at about 8.6" in height.
If my image width was 3800 pixels wide:
3800 / 72 = 52.78"
52.78" / 4.16 = 12.69" wide
This image can be printed with an ideal resolution at about 12.69" in width.
This image has an ideal print size of 8.6"x12.69" inches. If your image in your design is larger than this size then you may need a larger image. If your image is smaller than this size in your design then you're good to go.
ColorColors in your image will be printed from the file submitted or emailed. House colors may be used for standard colors. Color matching is not guaranteed unless a pantone color is specified and an actual color match sample is approved. (Additional fees may apply)
CMYK (Cyan, Magenta, Yellow and Black) are the colors used in the printing process, whereas RGB (Red, Green & Blue) are the colors used by electronic screen displays such as your monitor. Therefore actual printed colors may vary based on the image and monitor settings you're using. Your artwork design should be created in CMYK mode, if possible, so that the colors that you see on the screen most closely match the final printed product. If you create your artwork in RGB, the colors in your printed product will vary slightly. Many of the bright values produced by your monitor cannot be reproduced in the printing process. Colors displayed by computer monitors vary from computer to computer based on individual settings and manufacturing differences. The color you see on your screen is only a close representation of the final results.
Converting Fonts to OutlinesText can be converted to curves (paths) in some graphics programs. This will prevent upload errors that result when fonts are not embedded in your file. If you send us your vector file and we don’t have the same font our software will replace the font with another font that may or may not be the same. In most cases its nothing alike, therefore it’s vital to convert your text to outlines before sending us your file. Following these simple steps will help ensure that your text prints correctly.
- How to convert fonts to outlines in Adobe Illustrator:
- Select all text.
- Click Type Menu> Type> Create Outlines or (Shift+Control+O)
- Text will become non-editable.
- Save a copy and upload or email as .pdf.
Please use vector artwork when possible. Convert all text (fonts) to outlines (paths). Raster images should be no less than 300 dpi at full size. Colors and quality of print may vary slightly depending on your screen settings, file type and other variables. We are dedicated to quality and will always contact the customer if there is issues with there order.
